How to Help Users Figure Out Windows 8
Reading some of the negative comments that have appeared on the Internet about the user experience in Windows 8, I was expecting something of a mess when I first installed the Release Preview.
Most consumers simply don’t need a desktop, and the desktop user interface doesn’t work well on touch devices. But to my surprise, the old combination of a Start menu and a desktop now seems archaic after working with Windows 8 for a month.
Here are seven tips and tricks that you can use in your organization to make the transition to Microsoft’s new OS a little smoother for users.
1. How to Get Quick Access to Shut Down and Hibernate
To enable faster boot times, Windows 8 performs an operation similar to Hibernate when you choose to shut down, except that user profiles are logged off, as with a traditional shutdown, leaving just the operating system kernel in a suspended state. To get to Shut Down and Restart options quickly, press WIN + I and then select Power from the Charms Bar.
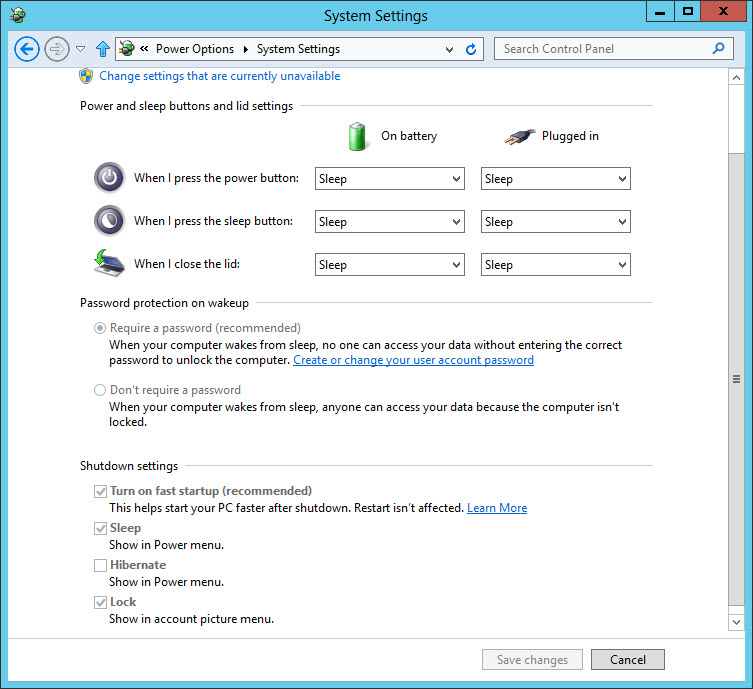
Hibernate is turned off by default in Windows 8, although it can be enabled by going to Power Options in the Control Panel and clicking “Choose what the power buttons do,” where there’s an option to show Hibernate in the Power menu. Here you can also deselect “Turn on fast startup” to return to a traditional shutdown in Windows 8.

Figure 1 – Power options in Windows 8
2. How to Search Files and Access Applications
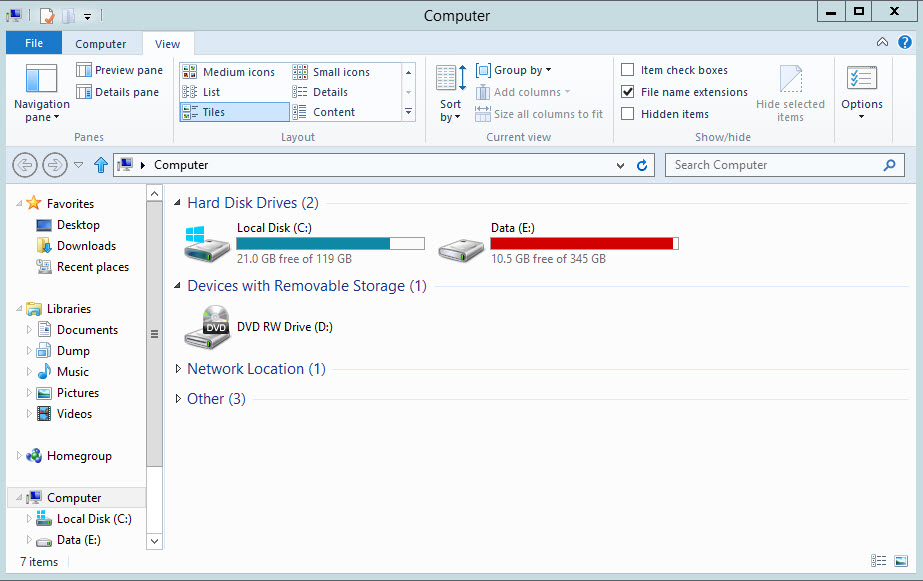
The easiest way to search files in Windows 8 is from File Explorer, the new name for Windows Explorer, in the dedicated search box at the top right-hand corner of the screen. Files can also be searched in the Metro interface by pressing WIN + F. File Explorer has an Office-style ribbon, which can be pinned open by clicking the arrow in the top right corner.

Figure 2 – The ribbon interface in File Explorer
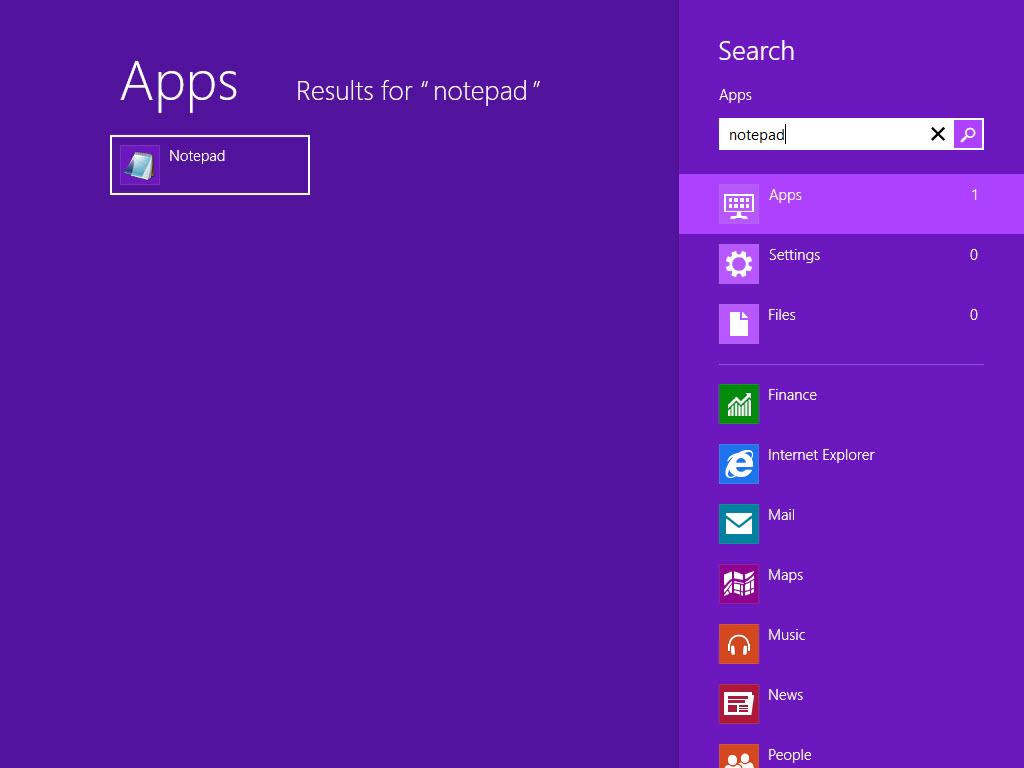
Another keyboard shortcut for search is WIN + Q, which takes you to the Metro search interface for apps. I found that a better way to search for applications is to simply switch to Metro using the Windows key and start typing the name of the app. This actually works better than searching for apps in the old Start menu and is useful if searching for applications that are used on a regular basis, but don’t make sense to pin to the task bar — for instance the calculator application. Assuming you can type quickly, the transition between desktop, Metro and back again is seamless.

Figure 3 – Searching for apps in the Metro interface
3. How to Access Settings and the Control Panel
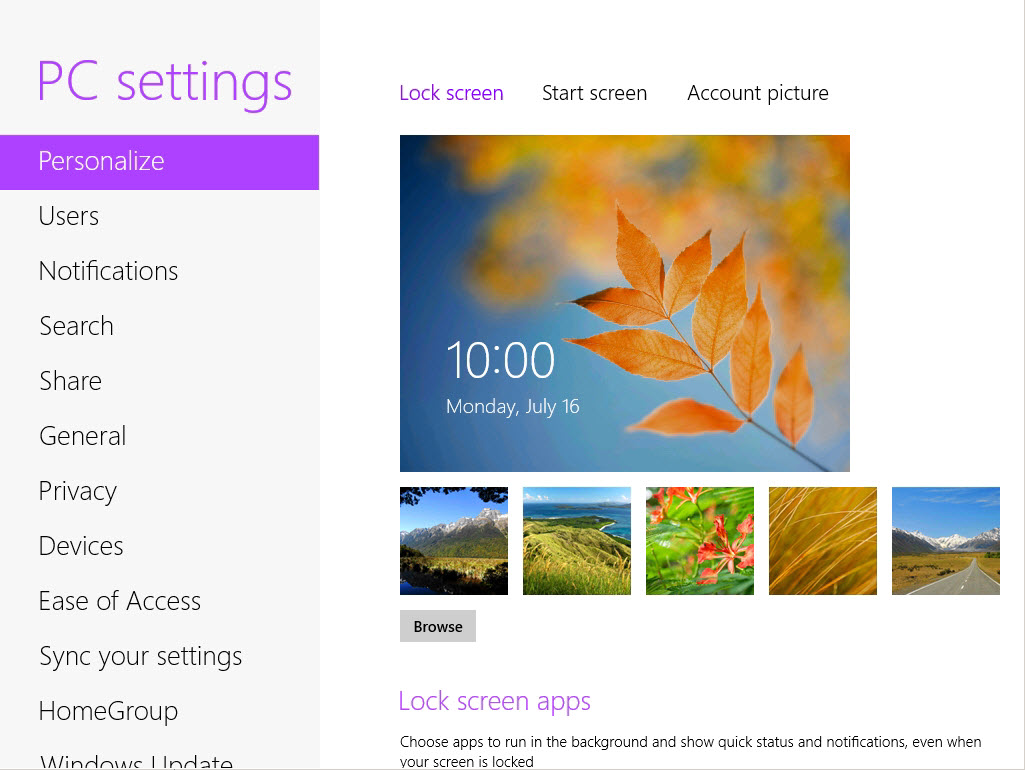
You can get to the new Settings Charm Bar quickly by pressing WIN + I or by accessing the Settings link that appears when you place the mouse to the far right of the screen. Here you’ll find the traditional Control Panel, the System window — now called PC Info — Windows Help and Personalization Settings. Hidden at the bottom of the Settings Charm Bar is a link to “Change PC settings,” which takes you to a new interface that replaces many functions found in the traditional Control Panel and should be easier to navigate from a tablet device or for novice users.

Figure 4 – Change PC settings in Windows 8
4. How to Enable Multimonitor Support
Better multimonitor support allows you to set a desktop background for each monitor or span a single image across multiple displays. The Task Bar can now be configured to appear on all monitors but show icons only on the monitor where the corresponding application window is open. If you’re using a large monitor instead of a built-in display on a notebook, Windows 8 remembers where icons are placed on the desktop when the screen resolution changes.
5. How to Work with Metro and Desktop Apps
Users of Vista and Windows 7 will be familiar with Aero Flip 3D, which was activated by pressing WIN + TAB, cycling through all open windows in 3D. This has been replaced in Windows 8 with a more functional side bar displaying all open apps. From the new bar, you can close Metro apps by right clicking and selecting “Close,” or snap them to the left or right of the display. Applications can also be snapped left or right by dragging them out of the task bar with the mouse, so you can see multiple Metro apps, or a Metro app and the desktop, simultaneously.
Also, moving the mouse to the top left-hand corner of the display allows you to cycle through the apps that are currently open. If you miss the Start menu, moving the mouse down to the bottom left-hand corner displays a pop-up that will take you to the new Start screen.
6. How to Switch Input Languages
I constantly switch between two input languages in Windows, and while there has always been the ability to assign my own hotkeys to switch languages, the default switching mechanism (ALT + SHIFT) is awkward and sometimes results in the unexpected, such as displaying an application’s hotkey tips and typing for a long period, thinking I’ve changed input language.
Pressing the Windows key and the Space bar toggles between the input languages installed and also displays the current language in a pop-up window. This key combination and the confirmation pop-up work much better than the previous system in Windows 7; and though it may not seem like a big problem, when you have to switch languages hundreds of times a day, it makes a big difference. From a usability perspective, little has changed in Internet Explorer 10. One addition that you will no doubt appreciate is Spell Check, which is long overdue as most browsers have had this feature for years.
7. How to Connect Wi-Fi and Remote Networks
Another nice touch in Windows 8 is that network connections, such as dial-up and VPN, have been moved to the Charms Bar and work more reliably. In Windows 7, if you dialed a corporate VPN connection and tried to start working with it right away, it would often fail to connect to the remote resource.
It was sometimes necessary to wait 30 seconds before the remote connection started working. Now, it is active immediately, and you don’t have to wait or won’t get an error message when connecting to a remote device. An Airplane-mode toggle switch has also been included, so you can easily disable wireless rather than using the switch located on the device itself, which performs the same function.


